


Post processing is an important part of creating compelling black and white landscape photography. Starting with a RAW image that has a wide range of tones and varied textures will give an image a good start but the editing process will bring polish to the image. Creating a black and white image is more than simply hitting a button in Lightroom to remove the color. There are several steps I take to ensure my black and white landscapes have a nice distinction between tones across the histogram.
1) To start, I ensure the image has a white and black point, stretching the tones to the edges of the histogram. The ensures a full range of luminosity values through the image. The one situation where I don’t do this is when I’m going for a lower contrast black and white.
2) The HSL panel in Lightroom or ACR is extremely helpful for working with individuals colors in the image to increase micro contrast in sections of the landscape. For example, darkening the blue channel will darken the tones in a blue sky. Raising the luminosity of yellow and orange will lighten up grasses or flowers of a foreground.
3) Dodging and burning is one of the most important tools in black and white photography. Gently brightening light midtones and burning slightly darker ones will create distinction in those shades of gray between black and white.This technique will enhance the light and shadow play in your images as well as bring out the details in nature’s textures. Dodging and burning can be done in any editing program you use.
Lightroom’s new masking options now offer additional power for selectively dodging and burning specific tones within an image. The Color Range and Luminance Range masks allow you create a panel of adjustments to specific tonal pixels within your image.
In Photoshop, I love to use Tony Kuyper’s Luminosity Mask actions to isolate particular tones and luminosity values for dodging and burning. These masks offer so many options to control which luminosity values you are adjusting.
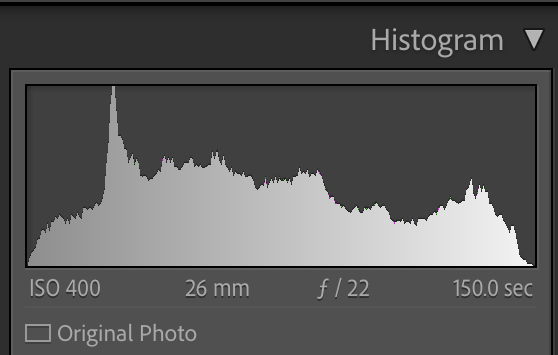
Keep in mind that strong black and white images don’t have histograms that all look the same. In some cases, tones are spread pretty evenly across the histogram like in the below image.

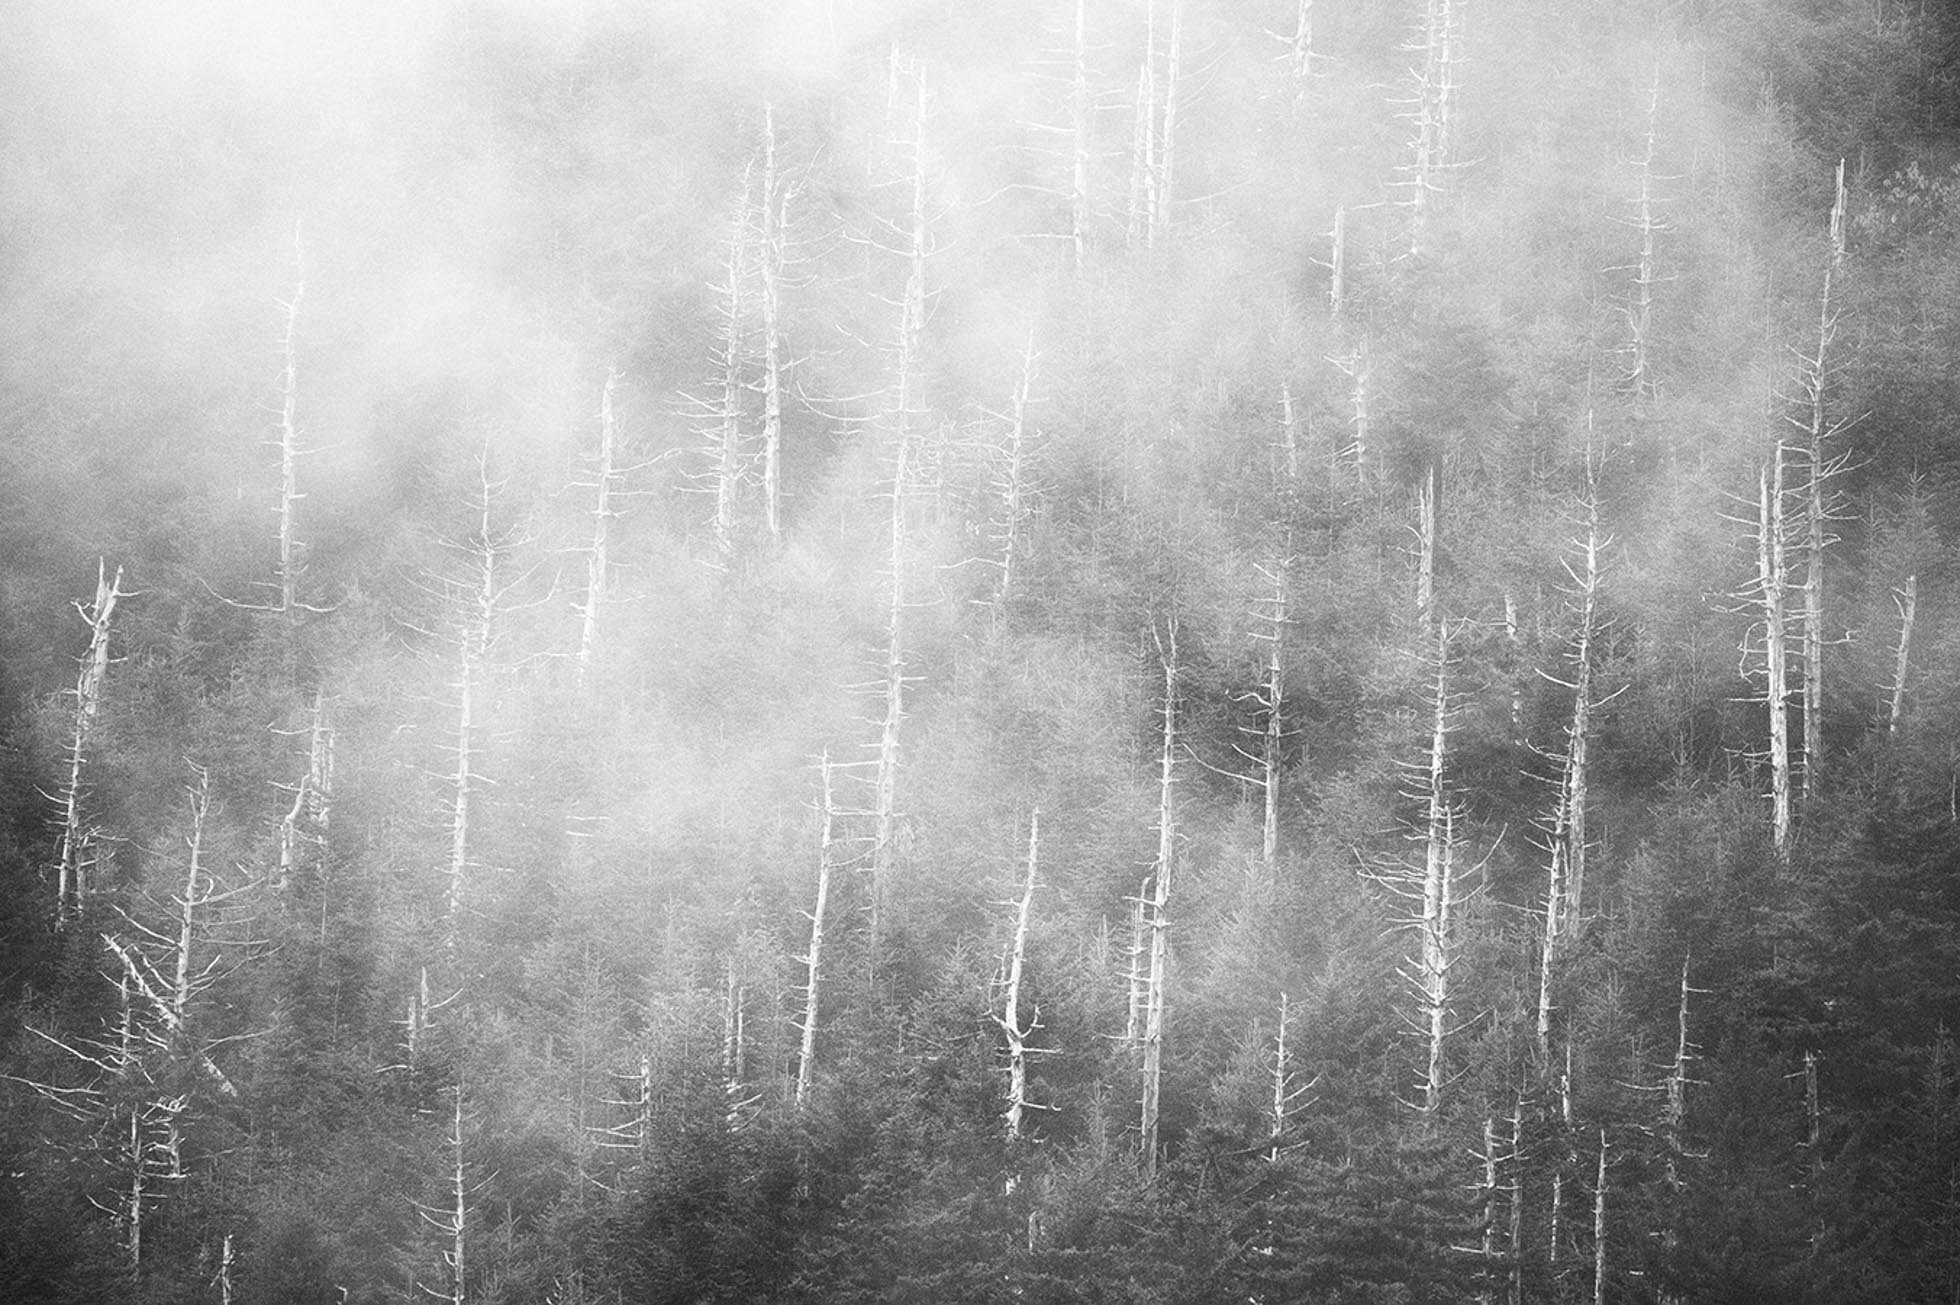
In some black and whites, there are more light tones where the histogram will lean towards the right like in this image with lots of fog amongst the trees.
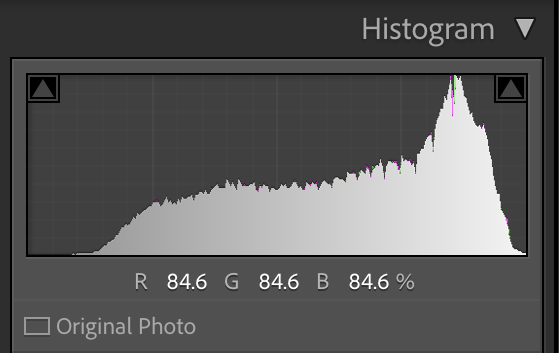
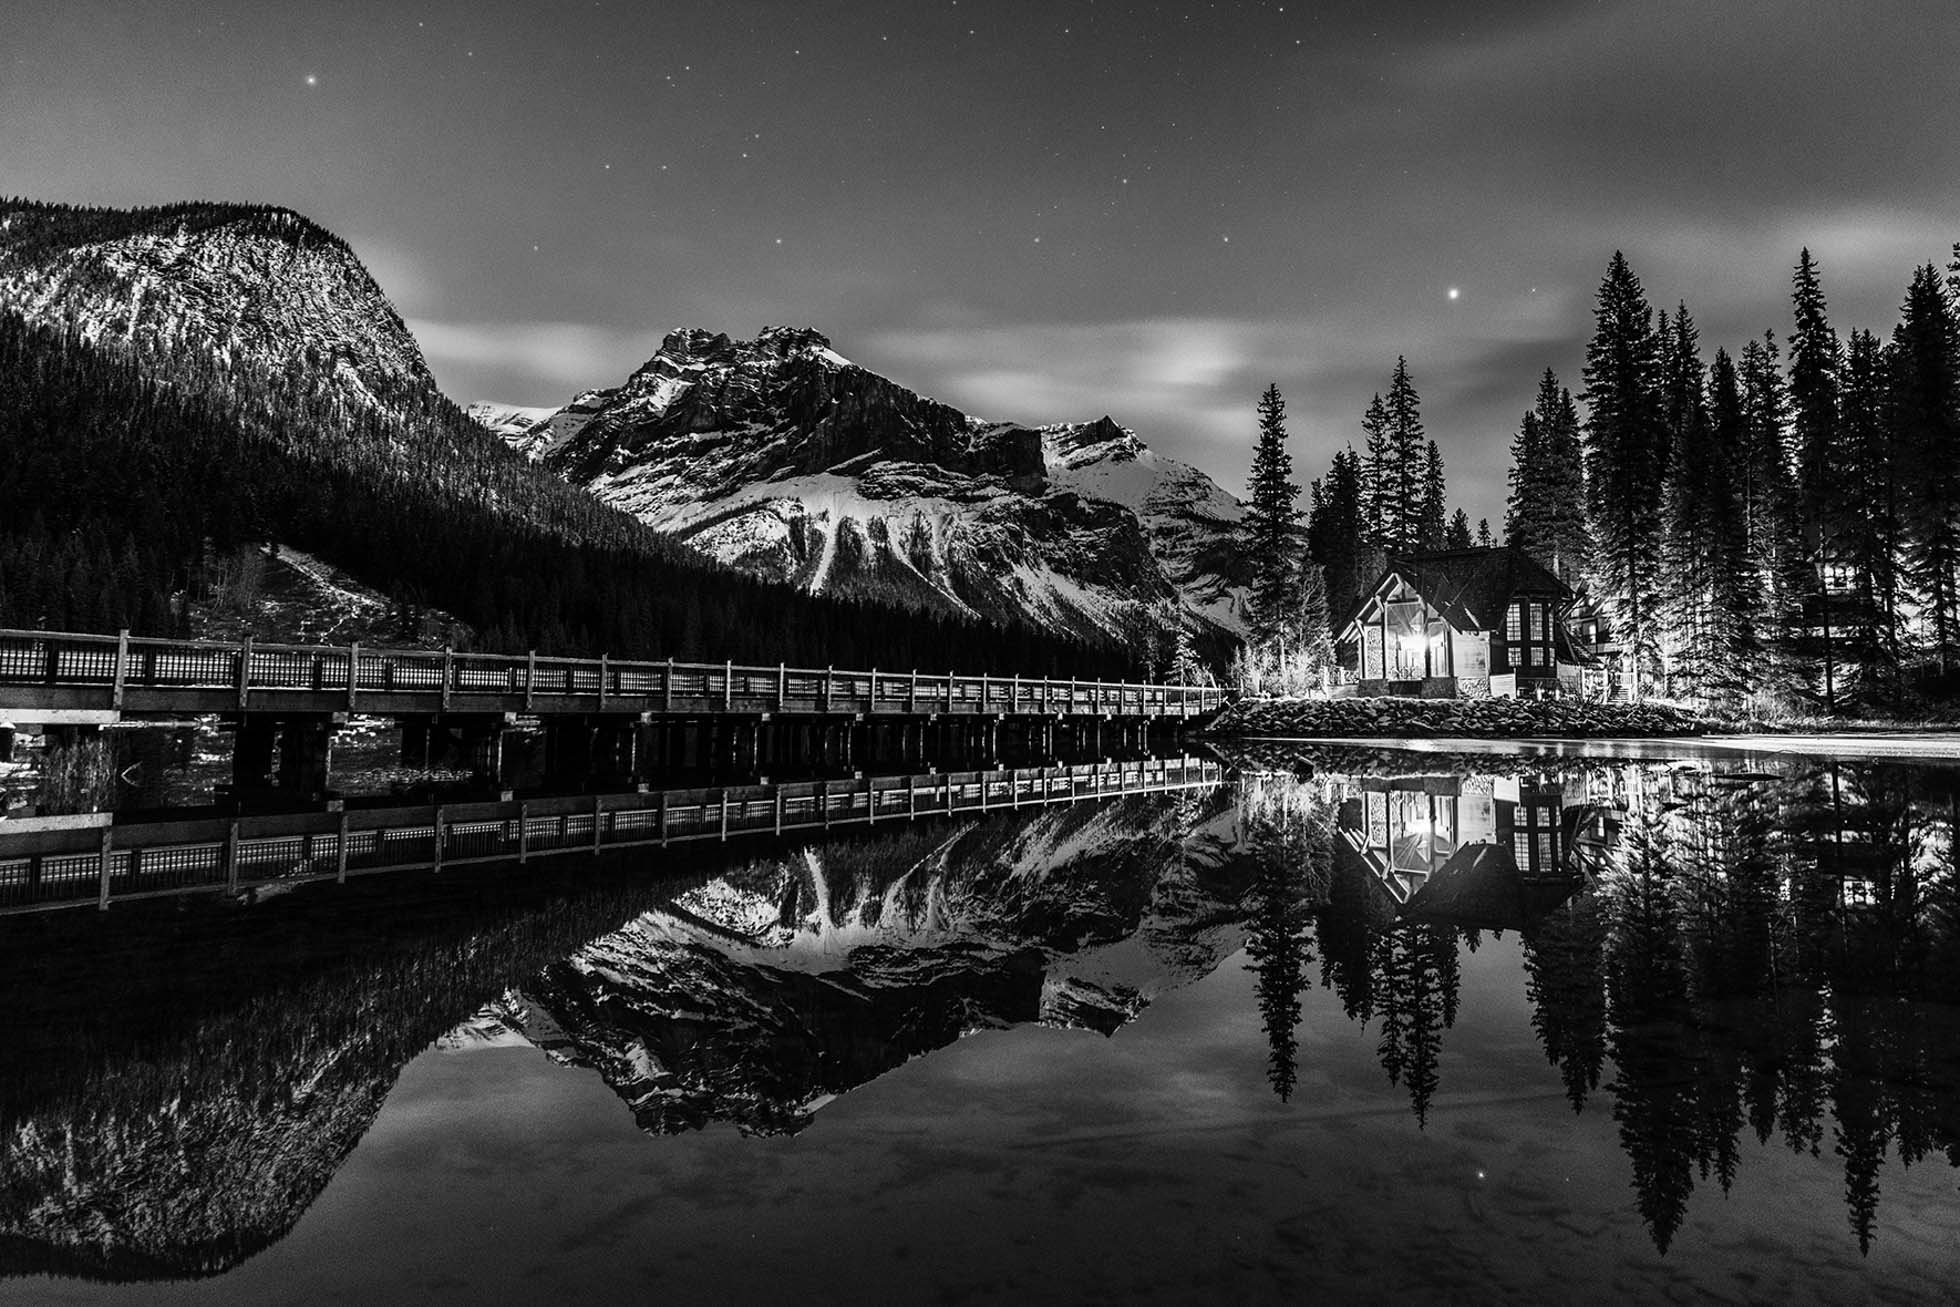
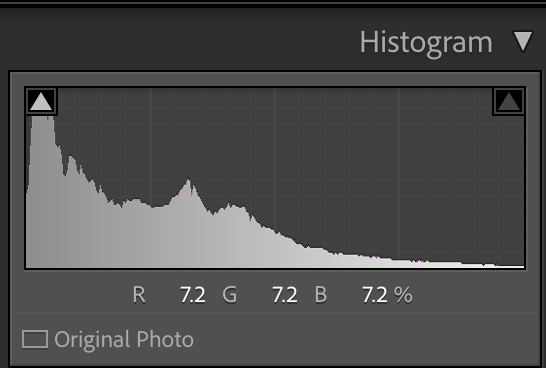
And in others, the tones will be heavy toward the left side of the histogram with lots of dark tones such as in this night time image of Emerald Lake. The histogram has a full range of tones from left to right, with the lights being the bright white tones, but the predominantly dark scene is represented by the histogram showing heavily on the left.
4) My last and most important tip is to EXPERIMENT! Practice with lots of images and try various techniques. Try different things with the same image. Ask for feedback from friends you trust. And don’t be afraid to push your adjustments a little further in black and white than color and get creative!
Post processing is a personal and subjective process. There are many tools in the various software programs. The techniques I share are ones that work for me, but you may have others that work best for you. That said, I always like to try new things and learn from others, so perhaps my steps will add something new to your workflow!
Kristen Ryan is an award winning and published landscape photographer and educator residing in the Midwest suburbs of Chicago. All images are available for purchase in the Fine Art Store or by request. Kristen leads ladies landscape photography retreats in the Tetons, Glacier NP, Hilton Head, Chicago, and the Canadian Rockies, offers private mentoring . New online educational materials are coming soon!